
Product Support
What can we help with?
How To
Setting Your Temperature: Odin Ice Bath 2.0

How to prepare your Odin Ice Bath for winter
1. Check the Weather Forecast:
Before taking any action, monitor the local weather forecast regularly. Specifically, pay attention to temperatures and severe weather alerts, especially if they predict temperatures below 0ºC (32°F) or severe weather conditions.
2. Identify Extreme Cold Alert:
If the forecast indicates temperatures below 0ºC (32°F) for an extended period, or if there is a severe weather alert, it's time to take precautionary measures for your Odin Ice Bath.
3. Turn Off the Odin Ice Bath:
Ensure that the Odin Ice Bath is turned off completely. This prevents any potential damage during the draining process.
4. Locate the Drain Valve:
Identify the drain valve on your Odin Ice Bath. This is usually located at the bottom of the unit. Consult your user manual and follow the How to drain my Odin Ice Bath on page 8.
Ensure that the water is completely drained from the Odin Ice Bath. This step is crucial to prevent freezing and potential damage.
5. Unfasten the Filter:
Locate and unfasten the filter from the Odin Ice Bath. Empty the filter to remove any debris or water that may be trapped.Consult your user manual your filter guide on page 10.
6. Loosen the Pipe to the Pump:
Loosen the pipe that goes directly to the pump. Carefully pull it off to ensure there isn't any water remaining in the pump. This step helps prevent damage caused by freezing water in the pump.
7. Clean the Odin Ice Bath:
Once drained, clean the interior of the Ice Bath, including the filter and pump area, to remove any residual water or debris. This helps maintain the unit and ensures it's ready for future use.
8. Store Indoors:
If possible move the Odin Ice Bath to an indoor storage location. This can be a garage, shed, or any other suitable indoor space that protects it from extreme cold temperatures and severe weather.
9. Regularly Monitor Weather Updates:
Stay informed about weather conditions and, if necessary, repeat this process periodically during the winter months to prevent any unexpected damage.
By following these updated steps, you can effectively drain, clean, and store your Odin Ice Bath, including additional precautions to safeguard the filter and pump components.
Extreme Cold Alert (Below (0ºC) 32°F):
If your Odin Ice Baths is located outdoors and the weather forecast predicts an ambient temperature below 0ºC (32°F) for an extended period, it's time to take action.
Fully drain your Odin Ice Bath to prevent freezing and store inside to protect them from the cold.
Follow our step by step on properly draining and storing your Odin ice Bath to shield from the harshest winter conditions.
Severe Weather Alert:
If your local weather forecast predicts severe conditions, such as extreme cold, heavy storms, or other significant weather events, it's essential to act proactively.
Fully drain your Odin Ice Bath to safeguard it from potential damage and store indoors for their protection.
Follow our step by step on properly draining and storing your Odin Ice Bath.
How to Prepare Your Odin Plunge For winter
1. Check the Weather Forecast:
Before taking any action, monitor the local weather forecast regularly. Specifically, pay attention to temperatures and severe weather alerts, especially if they predict temperatures below 1ºC (33.8°F) or severe weather conditions.
2. Identify Extreme Cold Alert:
If the forecast indicates temperatures below 1ºC (33.8°F) for an extended period, or if there is a severe weather alert, it's time to take precautionary measures for your Odin Plunge.
3. Turn Off the Odin Plunge:
Ensure that the Odin Plunge is turned off completely. This prevents any potential damage during the draining process.
4. Locate the Drain Valve:
Identify the drain valve on your Odin Plunge. This is usually located at the bottom of the unit. View our How to drain in our help centre.
Ensure that the water is completely drained from the Plunge. This step is crucial to prevent freezing and potential damage.
5. Unfasten the Filter:
Locate and unfasten the filter from the Odin Ice Bath. Empty the filter to remove any debris or water that may be trapped.Consult your user manual your filter guide on page 10.
5. Loosen the Pipe to the Pump:
Loosen the pipe that goes directly to the pump. Carefully pull it off to ensure there isn't any water remaining in the pump. This step helps prevent damage caused by freezing water in the pump.
6. Clean the Odin Ice Bath:
Once drained, clean the interior of the Ice Bath, including the filter and pump area, to remove any residual water or debris. This helps maintain the unit and ensures it's ready for future use.
7. Store Indoors:
If possible move the Odin Ice Bath to an indoor storage location. This can be a garage, shed, or any other suitable indoor space that protects it from extreme cold temperatures and severe weather.
8. Regularly Monitor Weather Updates:
Stay informed about weather conditions and, if necessary, repeat this process periodically during the winter months to prevent any unexpected damage.
By following these updated steps, you can effectively drain, clean, and store your Odin Ice Bath, including additional precautions to safeguard the filter and pump components.
How to change my filter

Hot/Cold Setup: Odin Plunge
Our Hot & Cold Odin Plunge is designed to prevent freezing during the winter months, ensuring you can enjoy the benefits of cold therapy, even in the chilliest weather. It's a fantastic option for those looking to keep their Plunge active year-round.
Below, we'll walk you through the three key scenarios that require you to fully drain your Odin Plunge and store the chiller and water filter canister indoors. Afterward, we'll dive into the steps to keep your Odin Plunge operational in winter.
Extreme Cold Alert (Below (-12ºC) 10°F):
When the weather forecast predicts an ambient temperature below -12ºC (10°F) for an extended period, it's time to take action.
Fully drain your Odin Plunge to prevent freezing and store the chiller and water filter canister inside to protect them from the cold.
Follow our step by step on properly draining and storing your Odin Plunge to shield from the harshest winter conditions.
Severe Weather Alert:
If your local weather forecast predicts severe conditions, such as extreme cold, heavy storms, or other significant weather events, it's essential to act proactively.
Fully drain your Odin Plunge to safeguard it from potential damage and store the chiller and water filter canister indoors for their protection.
Follow our step by step on properly draining and storing your Odin Plunge
Extended Absence:
When you won't be around for more than 24 hours or when a winter storm is looming, follow these steps to protect your Odin Plunge.
Fully drain your Odin Plunge to safeguard it from potential damage and store the chiller and water filter canister indoors for their protection.
How to change my Ozone settings: Odin Ice Bath 2.0 (Western Australian and international Customers only)
Adjusting the Ozone Timer:
Start by pressing the 'RESET' button to reset the device.
To set the day and time, hold the 'clock setting' button down whilst pressing the 'day', 'hour' and 'minute' buttons to adjust the time.
Follow the steps in the table below to set the timer for when you would like the ozone to be operating.
To have the time switch run by the programmed events, set the mode to "AUTO" using the 'MANUAL' key.
At any time, you can manually turn on the timer switch (mode "ON") or turn off the timer switch (mode "OFF") by pressing 'MANUAL' key.
Maintenance
Maintaining Your Water Quality
For a home-use we recommend replacing the water in the Odin every 2-3 months, depending on the degree of use and your own personal preferences.
For commercial use we recommend changing the water in the Odin minimum once a week (depending of the volume of people using the Ice Bath & Plunge)
For residential use you do not need to add chlorine as every Odin comes with an ozone generator. You also have an optional upgrade of UV sanitisation as well which will keep your bath cleaner for longer!
For commercial application most states require chlorine to be added to the water when you have multiple different clients. Always seek professional advice on water quality from your Local/ State city council & local pool/ spa shop.
Deep Cleaning the Odin Ice Bath/ Odin Plunge
We recommend deep cleaning the Odin Ice Bath & Odin Plunge every 2 - 3 months for residential customers and minimum once a month for Commercial Clients (depending of the volume of people using the Ice Bath & Plunge)
We recommend the Wanda Battery Powered Spa Vacuum
https://shop.spaworld.com.au/wanda-battery-powered-spa-vacuum
Draining your Odin Ice Bath/ Odin Plunge
- Locate Drain Outlet:
Find the drain at the bottom of your Odin Ice Bath, connected to an elbow pipe. - Prepare Garden Hose:
Grab an 18mm (3/4in) garden hose for draining. - Attach Hose:
Connect one end of the garden hose to the elbow pipe. - Position Hose Outlet:
Place the other end of the hose in an appropriate drainage area. - Release Drain Seal:
Press the plug on the elbow pipe to start draining. - Monitor Draining:
Keep an eye on the process to ensure smooth drainage. - Wait for Completion:
Allow the Odin to drain completely. - Detach Hose:
Disconnect the garden hose once draining is done. - Secure Drain Components:
Close the plug on the elbow pipe to seal the drain.
Maintaining the cedar
The cedar can be wiped down with a cloth. Please re-stain the cedar every 6-12 months to keep it looking fresh.
Maintaining Steel Band tension
The Odin Ice Bath & Odin Plunge models require the Steel Bands to be checked and tightened every 1 - 2 months to ensure it remains firm and keeps the wooden staves in place.
Tools required:
17mm open-ended spanner.
Instructions:
- Locate the nut at one end of the steel band.
- Using the spanner, turn to the right until firm.
Please Note: Do not over tighten.
Maintaining the stainless steel
Please use either a stainless steel cleaner/methylated spirits/WD40 with a cloth to wipe down (please do after each time the tub is drained to ensure it is clean)
Changing / Cleaning Your Water Filter
The Odin Ice Bath and The Odin Plunge feature a reusable 50 micron filter, which can last 6-12 months.
(Residential)
Recommended cleaning schedule:
For everyday personal use - clean/replace filter every 3-4 weeks, depending on degree of use and your personal preferences.
(Commercial)
Recommended cleaning schedule:
For heavy/commercial use -clean/replace filter every 1-2 weeks for your client peace-of-mind.
If you are using the Odin in conjunction with a sauna or after exercise, the filter will clog up faster, as heat opens up the pores to expose the bath to oils and sweat. If you’re noticing a significant reduction in flow rate, that is an indicator of the filter needing to be replaced.
Replacement filters can be purchased off our shop page.
Troubleshooting
My water is not cooling/ temperature issues: The Odin Ice Bath 2.0
Ice Bath:
To ensure your Odin Ice Bath is running optimally for cooling, we recommend the following:
Ambient Temperatures:
Please be advised that your Odin Ice Bath is weather resistant, not weatherproof, due to the electronics in the compressor as well as the Red Western Cedar staves and MUST be undercover and in shade if outdoors or if indoors it’s in a well-ventilated space away from Saunas or Steam Rooms.
Ensuring that the Odin is undercover, away from direct sunlight and not kept in warmer climates exceeding (42°c) 107F is an important part of maximizing the life of the Ice Bath and the compressor and preventing malfunction or damage and ensuring the compressor is not overheating causing the Ice Bath to not cool. The cooling performance will be impacted by 50%.
If your Ice Bath is being located indoors and the ambient temperature exceeds 38°C or if located outdoors in direct sunlight the cooling performance will be impacted by 50% (it will be 50% less efficient). This can cause issues on refilling and cooling down your Odin Ice Bath.
In higher temperatures, the Odin has to cool more frequently than when in cooler rooms or undercover.
Ambient temperature plays an important role in scenarios such as:
- The functionality of the compressor and its ability to reach set ON & OFF temperatures.
- Ensuring the compressor is not overheating causing the Ice Bath to not cool.
ON and OFF Temperature Settings:
The ON and OFF temperatures play a crucial role in the cooling of the Odin Ice Bath. We recommend that the ON and OFF temps are no more than (3°c) 37F apart. For example, if your ON temperature (maximum temperature) is set to (7°c) 44F then your OFF temperature (minimum temperature) should be set to (10°c) 50F.
This is to ensure that the Compressor is not working overtime to reach its minimum and maximum temperatures and effectively cause problems with the Ice Bath cooling.
**Please follow our How To Guide on SETTING YOUR TEMPERATURE. All settings are in Degrees Celsius and not Fahrenheit**
How to Troubleshoot:
If you have now determined that your Odin Ice Bath is still not cooling, there are a few reasons that could be causing your water to not cool.
F14 (When the ON and OFF temperatures are switched around)
- Under the normal running status, press the unlock/OK button for more than 5 seconds, it will display F9, indicating it has now entered the SET UP menu.
- Press the UP button until you reach F14.
- Press UNLOCK/OK and ensure the number displayed is 0 (if it is 1, it means it is in heating and will be the reason why the ON temp is lower than the OFF temp).
- To change from 0 to 1 press the UP button once.
- Press UNLOCK/OK again and it should set it to refrigeration and allow the ON temperature to be higher than the OFF temperature.
E1 Error on Temperature Control Panel:
If you are receiving an E1 error on your Control Panel (will get instructions from guide)
My Odin Ice Bath has no power:
- Unplug your Ice Bath from the outlet and plug it into a separate outlet to check if there is still no power.
- Please check there is nothing else in your house causing an electrical trip as this may be an internal electrical issue.
- Please check there is no water leaking onto any of the electrical components in the housing step.

My Odin Ice Bath has power but won’t cool:
- Your compressor may need re-gassing. A qualified Refrigeration Technician will be required to gas the compressor with R404A (need more information on why it would require re-gassing in the first place?)
- There may be a leak in the compressor copper pipes, a qualified Refrigeration Technician will be required to check the copper pipes for any leaks.(need more information on why there would be leaks in the first place?)
If you have checked and completed the above steps and the Odin is still not cooling or reaching cold temperatures please provide all relevant information and any supporting evidence to our After Sales Support team so they can best assist you in determining if a component requires replacing or servicing.
Email support at: Info@odinplunge.com
My water is not cooling/ temperature issue: The Odin Plunge
Please be advised that your Odin Plunge is weather resistant, not weatherproof, due to the electronics in the chiller as well as the Red Western Cedar staves and MUST be undercover and in shade if outdoors or if indoors it’s in a well-ventilated space away from Saunas or Steam Rooms. Ensuring that the Odin is undercover, away from direct sunlight and not kept in warmer climates exceeding (42°C) 107°F is an important part of maximizing the life of the Odin Plunge.
If your Odin Plunge is being located indoors and the ambient temperature exceeds (42°C) 107°F or if located outdoors in direct sunlight, the cooling performance will be impacted by 50% (it will be 50% less efficient). This can cause issues on cooling down your Odin Plunge. In higher temperatures, the Odin has to cool more frequently than when in cooler rooms or undercover.
Ambient temperature plays an important role in scenarios such as:
- The functionality of the Chiller and its ability to reach set temperatures.
- Ensuring the Chiller is not overheating causing the Odin Plunge to not cool.
My Odin Plunge has no power:
- Unplug your Odin Plunge from the outlet and plug it into a separate outlet to check if there is still no power.
- Please check there is nothing else in your house causing an electrical trip as this may be an internal electrical issue.
- Please check there is no water leaking onto any of the electrical components in the Chiller unit.
Is my Odin Ice Bath/ Odin Plunge leaking or is it just condensation?
This article will guide you through how to troubleshoot leaking Odin Ice Bath/ Odin Plunge connections.
Condensation occurs when water vapour in the air comes into contact with a surface that has a lower temperature than “the dew point” of the surrounding air.
To determine if your Odin Ice Bath/ Odin Plunge may be creating condensation, please see factors below that may create condensation to form on some of the components of your Ice Bath/ Odin Plunge.
If your Odin Ice Bath/ Odin Plunge is in direct sunlight, outside in high temperatures or high humidity, inside in a room with minimum air flow, near saunas or steam rooms these are all factors which cause condensation.
On the Odin Ice Bath You may find condensation located in two areas:
1. Is in the housing box (pictured below)

2. The Bath Waste - located under your tub (pictured below) 
On the Odin Plunge you may find condensation in two areas:
1. The chiller in the areas pictured below

2. The bath waste (pictured below)

If you are still unsure whether or not your Odin has condensation or if it is leaking please turn off your Odin for a minimum of 24 hours with the insulation lid off and allow it to get down to room temperature (24°c) 75°F. This will help determine whether or not it was the condensation creating water to drip or if there may be a leak.
I’m having issues with my Filter/ Dirty Water
Ice Bath:
Please refer to our Maintenance Tab to ensure you are continuously maintaining the water qualityand the cleanliness of your Ice Bath and its filters.
- Please ensure that you or your customers are showering prior to entering the Ice Bath as sweat, grime and sand can affect the filtration and the quality of the water.
- Please do not use Magnesium, Epson Salts or any other similar products as this can affect the Filter.
- For Commercial customers we do recommend the use of Chlorine or alternatively Hydrogen Peroxide.
** Please consult direct with with your local city/state council and your local pool/spa with water sampling for testing.**
My Odin Ice Bath is not circulating water 2.0
If you find your water is not circulating even after you have:
Followed our step by step on cleaning or changing your filter.
Followed the step by step on draining and refilling the Ice Bath with clean water.
Then please follow these troubleshooting steps
Filter:
Remove the filter from the filter housing and run the Ice Bath, if you see small bubbles coming out of the jets and the water circulating. Then you must replace the filter.
If you do not see small bubbles or the water circulating then there may be an issue with the Pump.
Pump:
Firstly open the Housing Step and check to see if the magnetic pump is on and working.

If the magnetic pump it is on and working, then there may be air stuck in the pump, to resolve this press RED bleed button on top of the housing box (pictured below) continuously to bleed the magnetic pump line.
If it is not working then there may be an issue with the Magnetic Pump. Please provide supporting evidence and information to our After Sales Support team so they can best assist you in determining whether the Magnetic Pump requires replacing or servicing.
Specifications
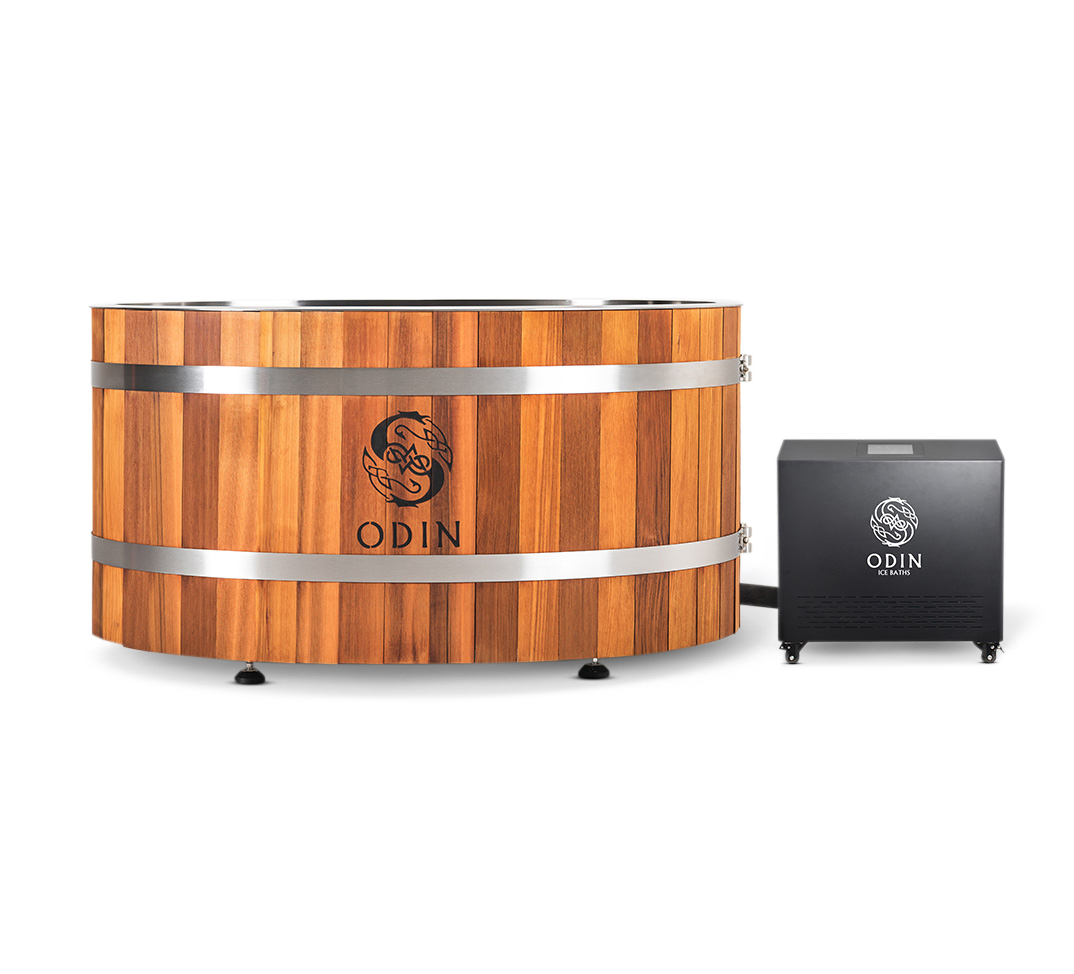
Odin Ice Baths 3.0

The Odin Plunge:

Manuals & Warranties
Setting up your Odin Ice Bath 3.0
- Unboxing and Placement: Your Odin Ice Bath will arrive fully assembled and gassed via Sea Freight (International Customers only) & road transport (Australian Customers Only).
- Place Odin on level ground:
- Please ensure your Odin is placed on a flat, level surface that can support the weight of your Odin. Please refer to the specifications sheet on page 3 of this user manual.
- Water Level and Initial Precautions:
- Do not power on the unit until the water level is above the bottom suction point to avoid damage to the pump (which may void the warranty).
- Filling Your Odin:
- Use a hose to fill the stainless steel tub.
- Maintain a 10-15cm (4-5 inches) gap between the waterline and the top rim, accounting for user height and weight to prevent spillage.
- Occasional splashes onto the cedar are acceptable, but avoid continuous overflow onto the housing step.
- Powering On:
- Please allow 24 hours for your Odin to rest prior to switching on.
- Once filled and rested, please ensure you plug the power cord into an outlet and switch on the Odin.
- Temperature Settings: Set your preferred temperature range - refer to temperature-setting instructions (page 6) in this User Manual for easy configuration.

SCAN THE QR CODE to our Step by Step video guide
Preparing your Odin Plunge
Unboxing and Placement:
Your Odin Plunge Chiller will arrive fully gassed and with the AC Plug for your region via Sea Freight (International Customers Only) & Road Freight (Australian Customers Only).
Location Requirements:
- Place the Plunge on a flat surface that can support the weight of your Odin Plunge. Place the chiller behind the tub with 12’’ between the chiller and the wall for proper air flow.
- Let the chiller rest for 6 hours before turning on to allow to settle.
Note: Failing to do so may result in chiller malfunction. - The Chiller cord is 2.2m in length, so please ensure it can reach your nearest power outlet. For distances further than this, an extension cord will need to be used.
What you need:
| 1 x Plastic Wrench | 2 x Filters |
| 2 x Hoses | 2 x Quick Connectors |
| 2 x Adapters | 2 x Rubber Hoses |
| 1 x Flat Head Screwdriver | 4 x Large Rubber Seals |
| 4 x Small Rubber Seals | 1 x Shutoff Valve |
| 1 x Hair Filter | 1 x Insulated Lid |
| 1 x Hose Adapter | 1 x Thread Tape |
Setting up your Odin Plunge
Step One: Chiller Set-Up
A. Prepare the Chiller:
- Locate your chiller.
- Apply a few layers of plumber's tape around the water outlet and water inlet connections on the chiller.
B. Prepare the Hair Filter:
- Find your hair filter accessory.
- Apply a few layers of plumber's tape around the connection.
- Unscrew and remove the filter lid.
- Attach and screw the filter lid into the water inlet connection on the chiller.
- Reattach the hair filter housing.
C. Attach the Shut-Off Valve:
- Locate the shut-off valve accessory.
- Apply a few layers of plumber's tape around the connection.
- Attach the shut-off valve to the hair filter connection and secure it tightly.
D. Connect the Hoses:
- Locate the first hose accessory and attach it to the shut-off valve connection found on the water inlet connection on the chiller.
- Locate the second hose accessory and attach it to the water outlet connection on the chiller.
Step Two: Odin Plunge Set-Up
A. Prepare the Odin Plunge:
- Locate your Odin Plunge and find the two hose connections on the back of the plunge.
- Apply a few layers of plumber's tape around the water outlet hose connection (top hose) and the water inlet hose connection (bottom hose).
B. Connect the Hoses to the Odin Plunge:
- Connect the chiller's water outlet hose (top hose) to the Odin Plunge’s water outlet hose and secure tightly.
- Connect the chiller's water inlet hose (bottom hose) to the Odin Plunge’s inlet hose and secure tightly.
Important Setup and Maintenance Instructions
These steps must be followed both during initial setup and as part of ongoing maintenance when the Odin Plunge tub is drained and cleaned. Failure to follow these instructions may result in flow-related errors causing your chiller to malfunction.
A. Connect the Hoses:
- Ensure all hoses between the tub and the chiller are properly connected.
B. Close Odin Plunge Plug and Valves:
- Locate the plug inside your Odin Plunge and ensure it is pushed in and closed.
- Locate the drainage pipe underneath your Odin Plunge and ensure the valve is in the closed position (Horizontal).
C. Fill the Tub:
- Ensure the water level is higher than the top of the filter at the side of your chiller.
- Fill the tub with clean water, ensuring there is a 10-15cm (4-5 inches) gap between the waterline and the top rim of the Odin Plunge.
D. Open Shut-off Valve:
- Make sure the Shut-Off Valve on the Chiller is in the open position (Vertical).
E. Power On:
- Turn on your power supply.
- Press the Reset button on the RCD (Residual Current Device).
- Important: DO NOT ACTIVATE THE TOUCHSCREEN AT THIS POINT.
F. Bleed the System:
- Locate the Red bleed button at the top of the filter housing.
- Continuously press this button to allow any air to bleed out of the system.
- The bleeding process is complete when water, rather than air, comes out from the bleed button.
G. Start the Chiller:
- Once all the air is out of the system, unlock the touchscreen. (Refer to Touch Panel Operating Instructions)
- Start the chiller.
Order Details
International Customers
For American orders, the USD prices listed include shipping to all lower 48 states in America. For Alaska and Hawaii please email for a quote.
**Please note: Puerto Rico is NOT considered part of America and will incur additional shipping costs.
For international orders, shipping may be similar to the USD pricing, but varies depending on your exact location. If you can contact us with a shipping address and your model of interest we will provide a shipping estimate.
ALL CUSTOMERS: Additional duties or customs fees will be payable by you; it is recommended you contact customs authorities in your country to ascertain if any such fees apply.